I have completed the first level of the Altenew certification program. It has been a joy to watch the instructors share their talent! I’ve tried some new-to-me techniques, picked up tips and tricks, and these classes have made me think about the creative process a little differently.
I am excited to share with you my final project. I was asked to select any 3 components from the classes and I chose to combine my selections to create an encouragement card. I also challenged myself to use images other than flowers (SO hard for me as elegant floral cards are my favorite genre).
The three components used are layering (All About Layering), embossing with dies (Die Cutting Techniques), and using metallic paper (Let It Shine). I have listed the supplies used at the end of this post. Let’s take a look:
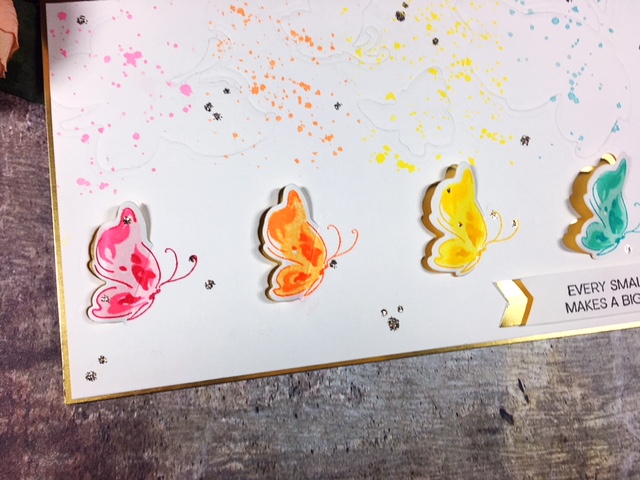
When I decided against flowers, I knew I wanted to try butterflies. They are such beautiful, delicate creatures and remind me of my childhood running after the Monarchs. I haven’t done much rainbow coloring or stamping on my cards but I thought this would be the perfect project for that so I chose a more pastel-colored rainbow for the first technique of layering. This butterfly set has three layers for each image. *Tip: it helps to use a stamp positioner when you are inking onto thick watercolor cardstock. I had to re-stamp the images because the textured paper was “thirsty”. Another advantage is that you can get perfect placement of the layers with a positioning tool. Coordinating splatters above each butterfly balanced out the scene.
This card measures 4.25 x 9, plenty of room to play with. To add interest to this panel I embossed the images with the matching dies on the top portion of the watercolor card, incorporating my second technique. *Tip: thicker cardstock results in a better impression when embossed; I used a second piece as a shim underneath the panel before running through my cutting machine. Next I partially die-cut the wings for a peekaboo look at the gold foil cardstock underneath, then scored lightly from open edge to open edge to easily “flip” or fold back the wings. *Tip: use washi tape to secure your die to the panel and use the tape’s edge to create a visual line of where you will cut. For my final technique of using metallic paper I adhered a panel of gold cardstock behind the panel and then gently lifted the die-cut areas. I also trimmed the panel slightly smaller than the gold card to leave a tiny gold frame around my panel.
Next I added the front sentiment, which I stamped onto a piece of the same cardstock, cut and notched the end, and added a notched gold flag piece as well to bring everything together. Stickles were the finishing accent for the front of this card.I added an inside sentiment and included a couple of butterflies in there, too.
Finally, I carried the theme over onto the back of my card just above my logo.
So there she is, a compilation of crafty knowledge from the Level I course of the AECP. I hope you like it as much as I enjoyed creating it! A big "Thank You” to Virginia Lu for her guidance and patience through the process!
Main supplies used:
Canson XL 140# watercolor paper
Tim Holtz Stamp Platform
Altenew Painted Butterflies stamps and dies
Spellbinder Platinum Machine
Altenew Ink Sets: Red Cosmos, Warm and Cozy, Pocket Full of Sunshine, Sea Shore, Cool Summer Night, Shades of Purple
Altenew Gold Foil cardstock
Platinum Stickles
Altenew Adore You set
Altenew Beautiful Inside
Thank you for stopping by! Michelle


Great project, Congratulations for completing Level 1
ReplyDeleteThank you for your encouraging words! I had fun creating this.
DeleteThis is so beautifully done, Michelle! I love that you incorporated with so many elements! GREAT attentions to details, too! The splatter and butterflies are awesome together! The partial die cutting of the butterflies is superb! Thanks for the shout out (blushing here!!). Congratulations on finishing Level 1!
ReplyDeleteVirginia, you are the best cheerleader! Thank you so much.
DeleteWow , your card are so pretty.. love it 😍
ReplyDeleteThank you, Maryam!!!
DeleteCongrats on completing the first level. The card is gorgeous and I love the combo of techniques used.
ReplyDeleteSimply gorgeous! <3
ReplyDelete