Hi Friends!
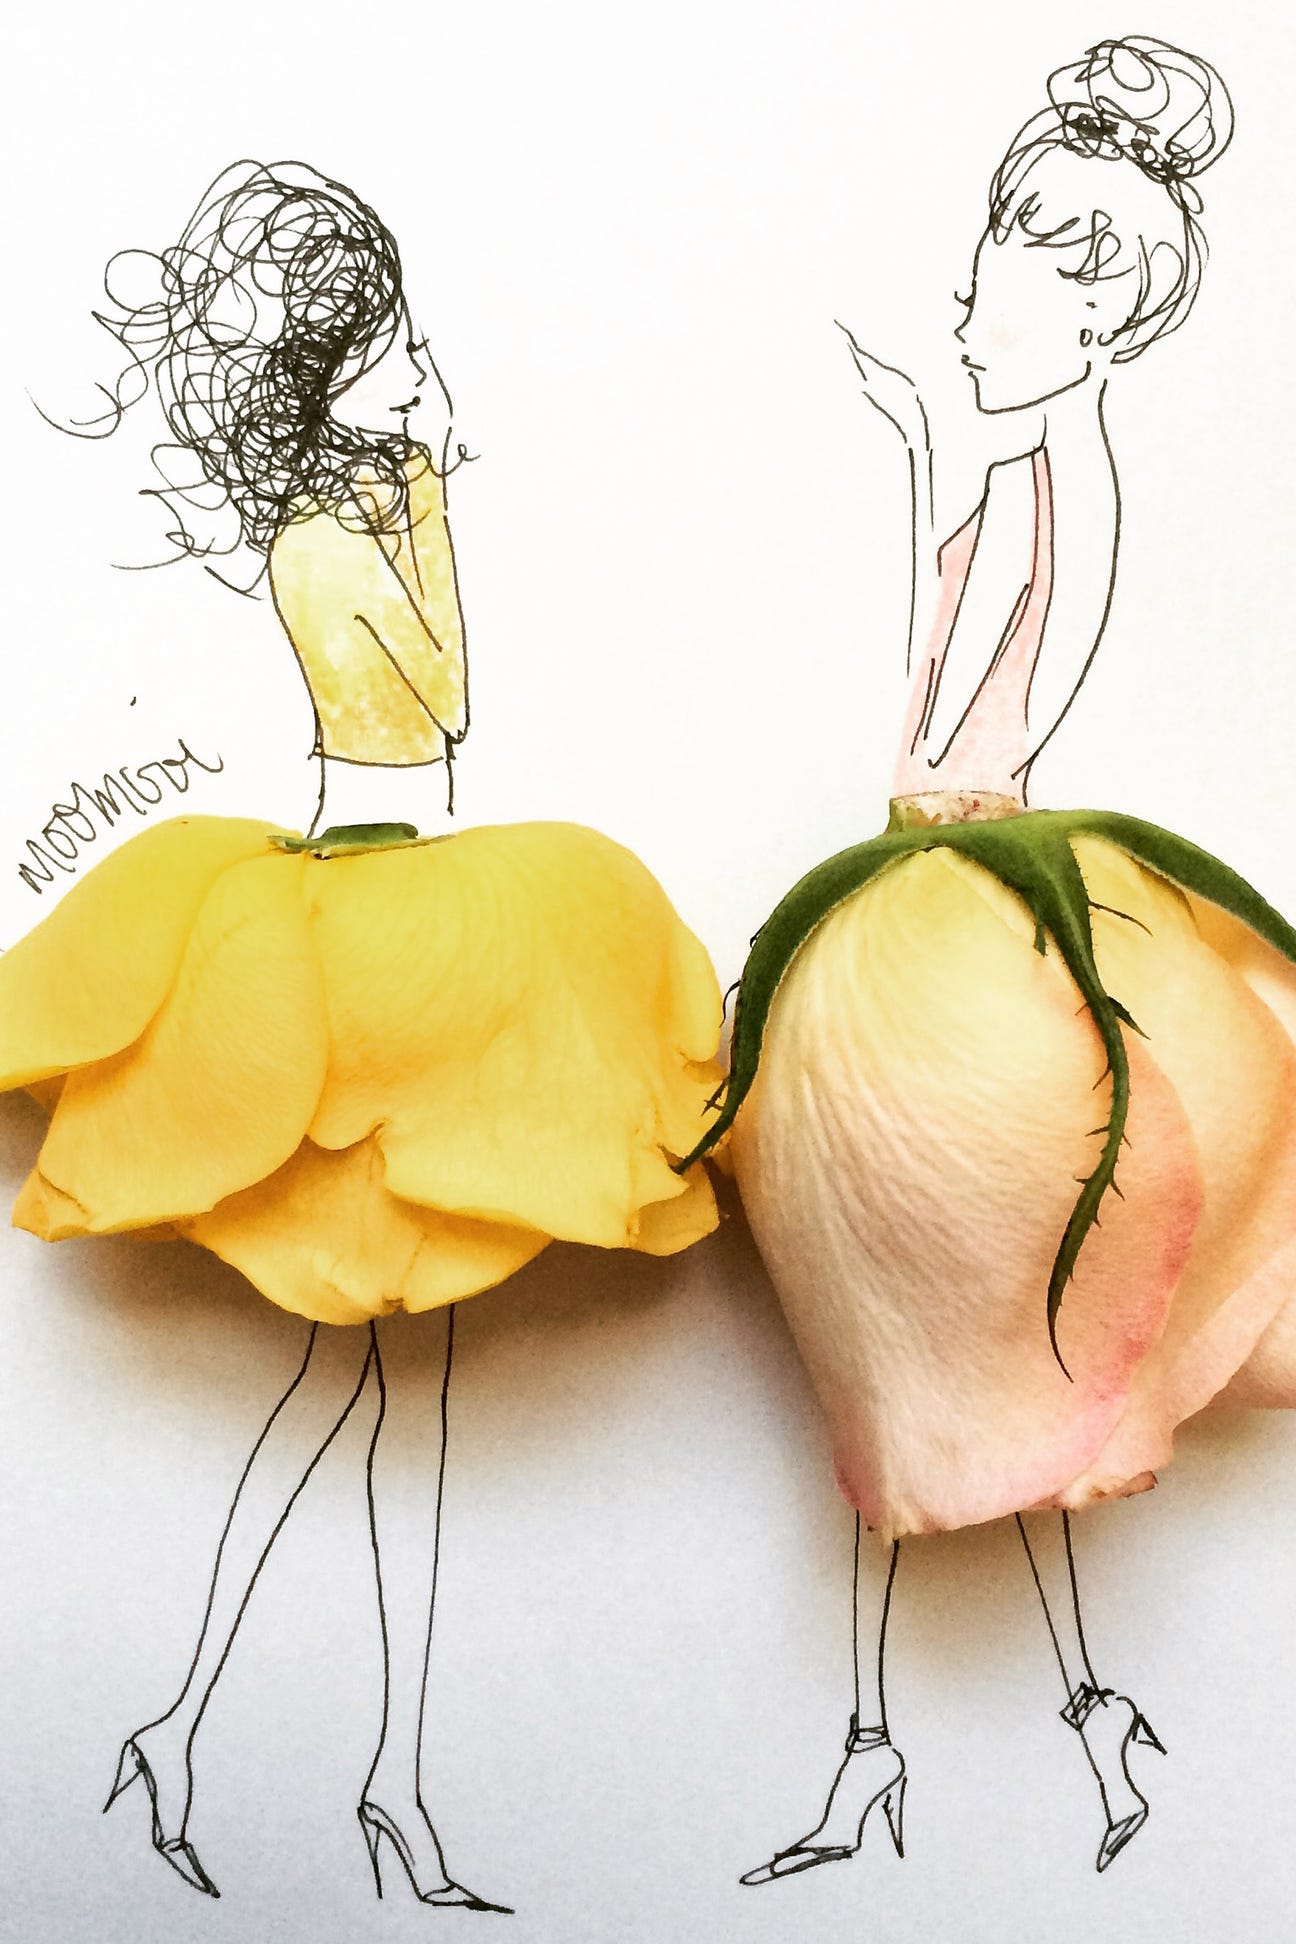
I am sharing my project for the Muse class taught by Carissa Wiley. This class was extremely informative and really peaked my artistic interest. It showed me how to look at everything around me as a potential piece of inspiration for a card. One of the photos Carissa shared on her Pinterest Board inspired my project. Here is the image:
and here are my cards:
What started out as an assignment ended up being Mother’s Day cards for two of our daughters.
The lady’s form comes from the Couture stamp set by Dylusions. I stamped her on my panel, created my own sentiment and made it a label with gold and black & white accent strips of paper (a la Carissa Wiley :))
Then it was just a matter of playing with the flowers to place them; some petals I cut off to conform to the shape of the skirt. Tickles gave the flower centers just a little sparkle.
I could easily see myself creating these cards with a bunch of different Altenew floral stamps!!! I really love the way these turned out.
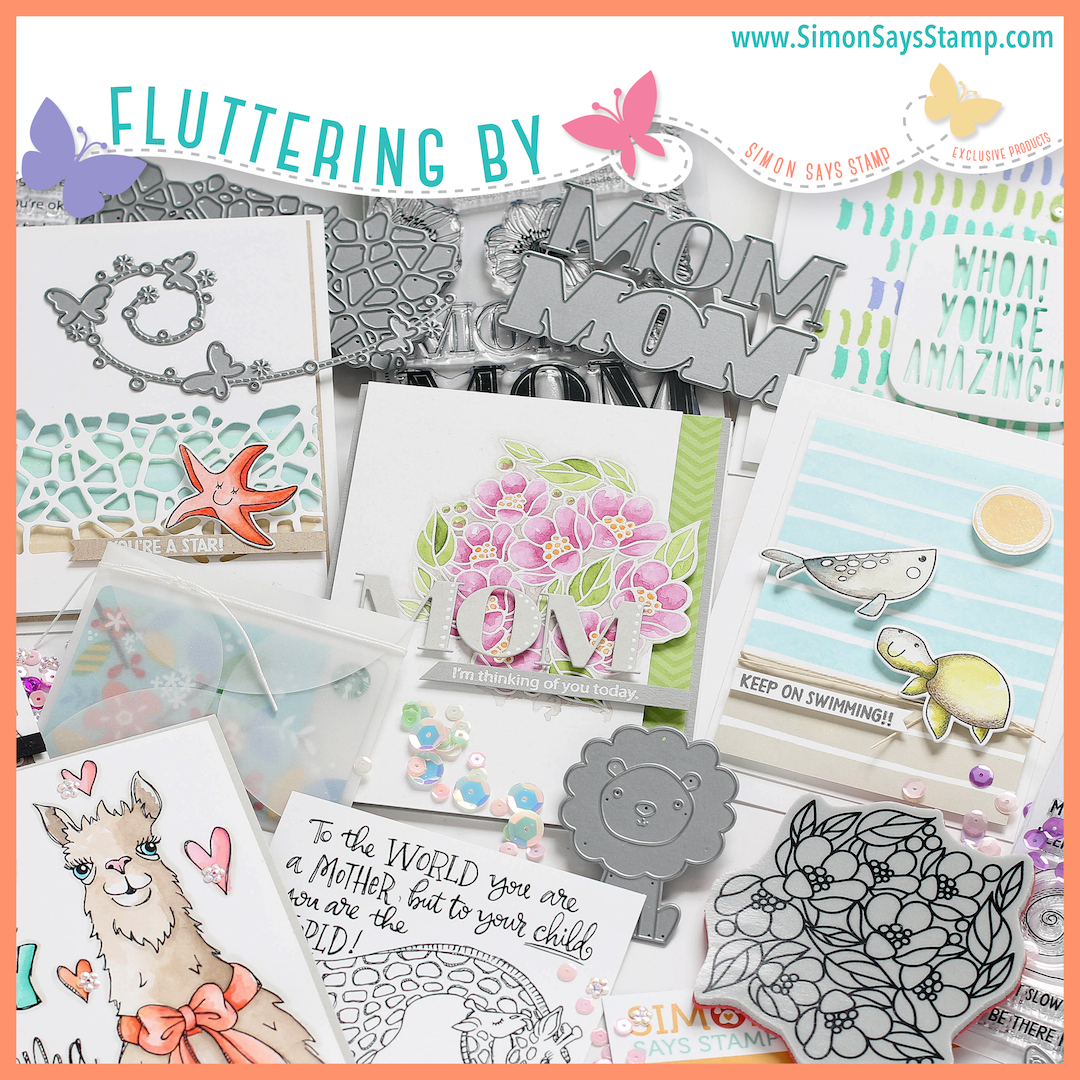
Simon Says Stamp has released another great set of products just in time for Mother’s Day cards! Just look at all that goodness👀👀
I have the Adeline Butterfly from the new collection (and can’t wait to get my hands on some of the other goodies) so I created three very different cards with this one die. The die has two pieces:
Here are my cards:
For card #1 I:
watercolored in rainbow order a sheet of Strathmore watercolor paper,
embossed the dried page with Simon’s Ornate background die in black ink,
die cut the butterfly several times from each color to maintain my rainbow order,
die cut the centers of the image in dark cardstock,
Hi Friends!
Today I am sharing my final project for level II of the AECP.
This project has stretched me WWWWAAAAAYYYYYYY (get the point) out of my comfort zone and creativity knowledge base. Through this assignment I have learned how to make a process video, record a voiceover and upload it to a new YouTube channel!! Whew, but I am SO grateful for the new knowledge! Also, hat’s off and bow down to all the YouTubers who do this on a regular basis--they rock!!
** this is also my disclaimer that the attached video is less than perfect. I apologize in advance for the little area of shaking.
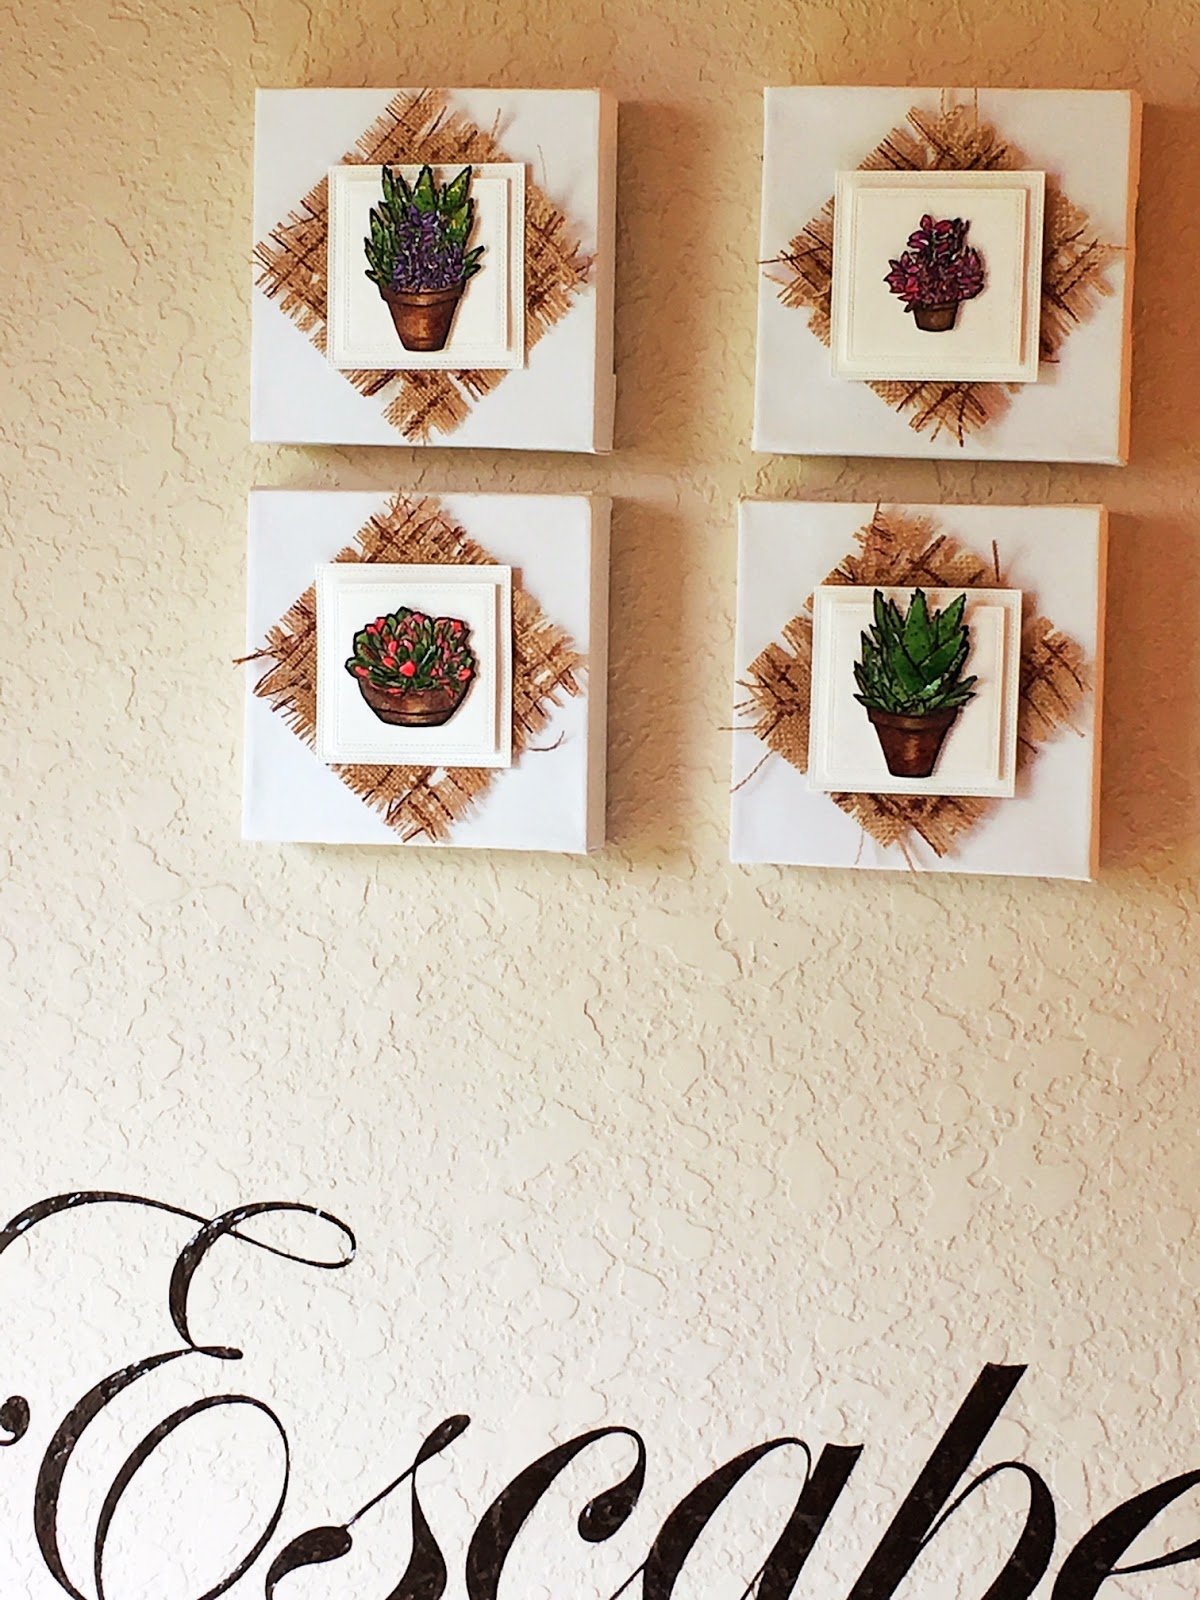
Enough rambling and on to my project, a four-piece 6x6 wall canvas grouping and matching card.
I will post a supply list at the end of this post.
If you would like to see the video click here:
Steps:
Stamp and watercolor 4 succulent images. I used Simon Says Stamp Intense Black Ink (any waterproof ink should work) and the Altenew Succulents stamp set. This stamp set only has three plant images so I created a fourth by masking and combining two of the images.
I colored my images with my Kuretaki Gansai Tambi watercolors using a no. 2 Silver Black Velvet round brush.
I lost a bit of outline detail from the watercolors so I used a black fine point waterproof pen to touch up those areas. I die cut the images with corresponding dies and then filled in the white borders with black ink.
Finally I used my Altenew Chocolate Brown Artist Marker to add more shading on the pots (see 4th photo from the top).
Here are the additional images:
After watercoloring I added Wink of Stella all over the images and Nuvo Crystal Glaze to the petals only. Set aside to dry overnight.
Next I took four 4 1/2 square pieces of burlap and distressed the outer edges. I used scissors and tweezers to pull some of the burlap skeins out and cut holes in other areas. Separated a few strands and once I was happy with the look I then colored some of the burlap threads with a dark chocolate alcohol marker. This created some contrast between the canvas and image matting while also pulling everything together as it complimented the browns in the pots.
Next I centered and adhered the burlap to the canvases using Multi Medium Matte. Flip the canvas over and press firmly against a hard surface.
For each image I die cut from the same watercolor paper a 3 3/8 inch square and 2 7/8 inch square. Using Tombow Mono Multi Liquid glue I attached craft-colored fun foam to the back of each cardstock square.
Center and stack the cardstock onto the burlap so your ‘sandwich’ from bottom to top is; canvas/burlap/fun foam/large square/fun foam/small square/succulent image.
And there you have your set! I think some of Altenew’s large floral blooms would look stunning assembled the same way.
For the matching card I stamped, cut and colored an additional succulent image and also duplicated the fun foam and square stack.
I mounted this onto a craft piece of cardstock. I added some interest to the bottom of this 5x7 card with another die by MFT- Die-namics Stitched Strip.
The sentiment, You Define Kindness, comes from Altenew’s Winter Rose.
This entire panel was adhered to another piece of the Stathmore Watercolor paper.